so if you’re like me, you usually don’t fuck around with screen orientation. You make an app to auto rotate.
But if your building an app in a day for a pitch that scans barcodes and plays videos, and you don’t have full res images assets, basically screen shots. You have some pages that should auto rotate and some that shouldn’t. Here’s how you do that.
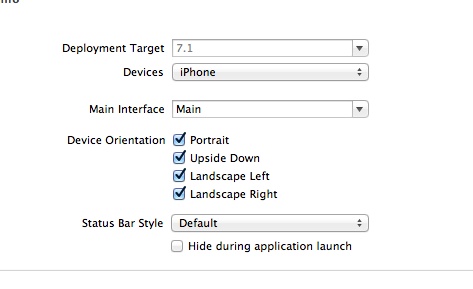
First off, you’ve embedded your project in a UINavigationController and you thought that was neat. Hurray. Second, you want to make sure in your app’s summary settings that you’ve set the interface orientation to everything.
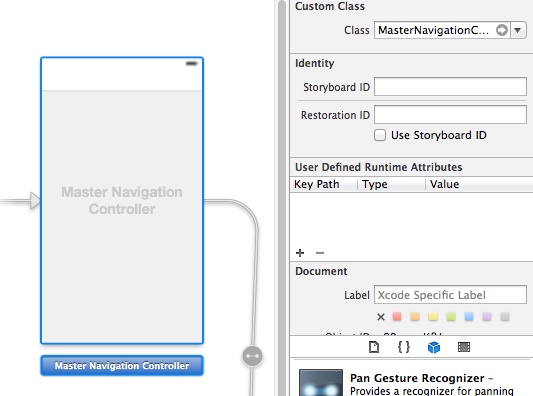
 Now you can start coding. First, make a subclass of UINavigationController and assign your nib navigation controller to be that class:
In you sublcass navigation controller now specify two function in your .m file:
- (BOOL) shouldAutorotate
{
    return [[self topViewController] shouldAutorotate];
}

- (NSUInteger)supportedInterfaceOrientations
{
    return UIInterfaceOrientationMaskPortrait;
}
This allows all orientations and sets the “shouldAutorotate” to your view controllers function autorotate.
So now in every view controller, just set the function in your viewController.m file:
- (BOOL) shouldAutorotate
{
    return NO;
}
or yes if you feel like it.
So there you have it, specify, when you need to.
