Let’s say you want to control a light/air pump/device from a microcontroller or raspberry pi…
We’re assuming the device in question is one that can easily be controlled simply by turning the power on and off.
You can use a relay. Basically these things are physical switches mounted inside a block with a small inductive coil next to it. When you push 5V through the coil, it creates a large enough magnetic field to pull the switch from one state to the other (on to off and vice versa). You just need to make sure the relay you’re using is rated for the voltage/current you’ll be pushing.
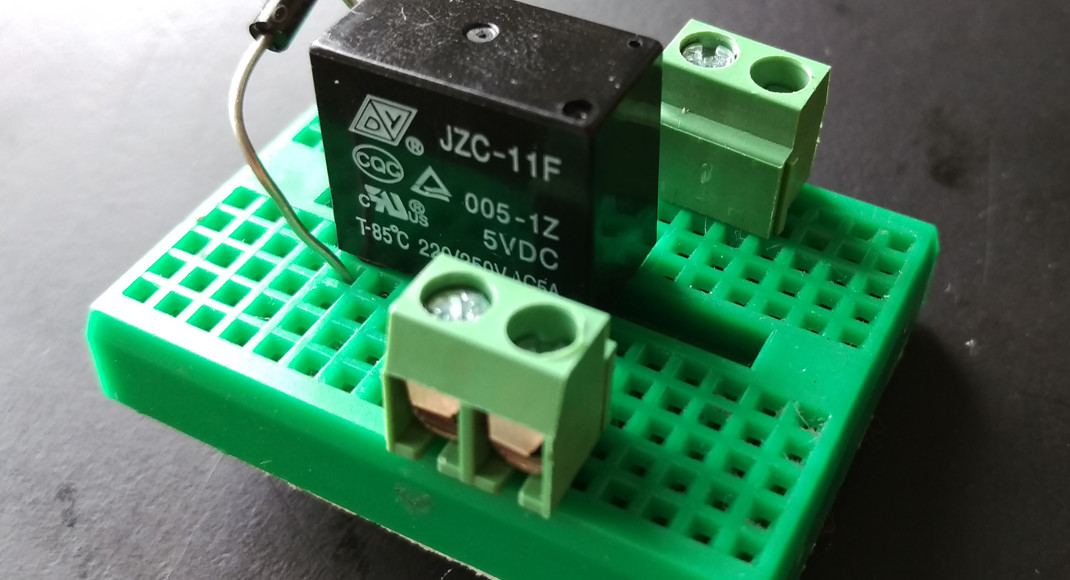
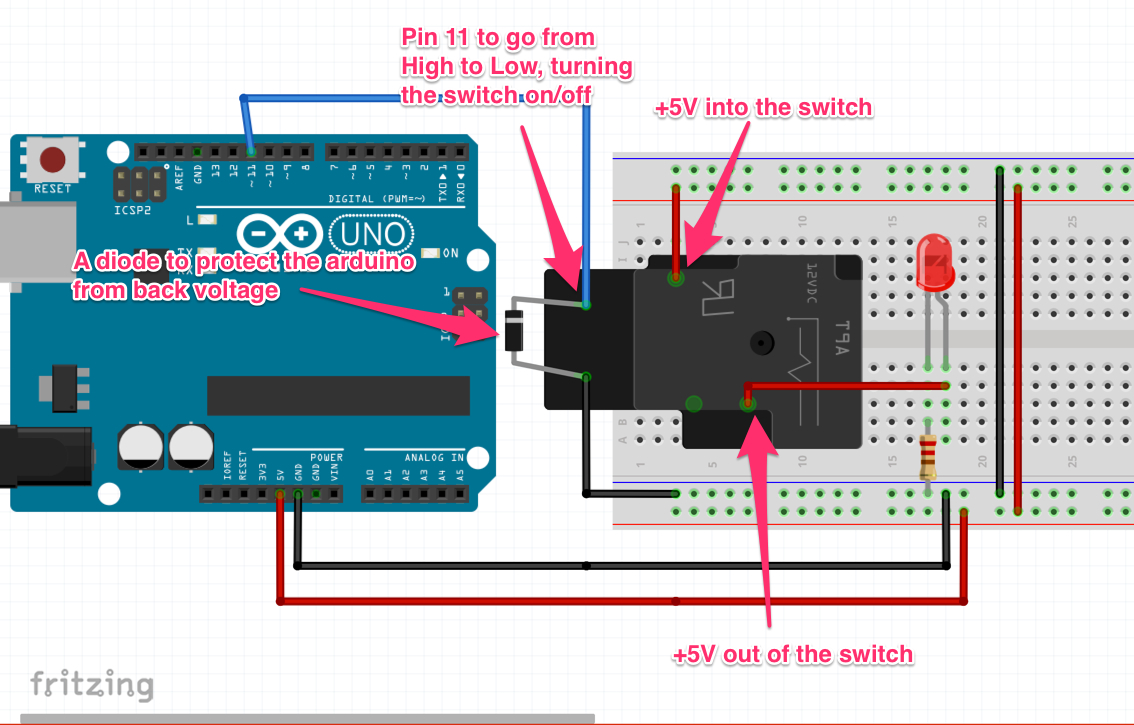
In my case, I wanted to push 120V at no more than 5 Amps through the relay to an air pump that would switch on and off depending on my arduino. I bought a JZC-11F relay and went to work, below is a wiring diagram:
You can see above, I’ve got pin 11 wired to one side of the coil on the relay and ground on the other. When pin 11 is “HIGH” it causes the relay switch to flip and allows current to flow through. On the other side I have a simple LED wired to the output of the relay switch and ground. When the switch turns on, current flows through the relay and turns the LED on. I’ve also included a diode across the coil to prevent voltage backflow into the arduino. Sometimes when a current is high enough, the coil can build up a voltage, when pin 11 goes to “LOW” that voltage needs someplace to go, without a diode, the voltage could flow back into the arduino, damaging it. The diode prevents flow in this direction.
Here’s a quick video explaining the actual test:
And here’s the code:
[pastacode lang=”cpp” message=”” highlight=”” provider=”manual”]
// Pin 11 has an LED connected on most Arduino boards.
// give it a name:
int led = 11;

// the setup routine runs once when you press reset:
void setup() {
  // initialize the digital pin as an output.
  pinMode(led, OUTPUT);
}

// the loop routine runs over and over again forever:
void loop() {
  digitalWrite(led, HIGH);   // turn the LED on (HIGH is the voltage level)
  delay(1000);               // wait for a second
  digitalWrite(led, LOW);    // turn the LED off by making the voltage LOW
  delay(1000);               // wait for a second
}
[/pastacode]
That’s it, next I’ll post something about what I did with this circuit!


One thought on “How to Wire/Control a Relay with Arduino or Raspberry Pi”