Over the years I’ve moved steadily into a toolset that requires less and less server management for my projects. I now focus on making “apps” instead of custom applications on the server since it’s more secure, easier to manage and automatically backed up. However, every once in a while I find myself doing a little server management and for that, I love EC2’s services.
In this tutorial, I’ll be covering two cloud services (Amazon EC2 and Google Cloud Compute Engine). Both services are the weapon of choice for developers on the move with little time to worry about the details.
Amazon EC2
The following are some resources for setting up amazon EC2 Servers:
http://docs.aws.amazon.com/AWSEC2/latest/UserGuide/EC2_GetStarted.html
http://articles.slicehost.com/2010/5/19/installing-apache-on-ubuntu
The first thing you want to do is get your instance up and running. If you’re new to amazon EC2, click on the top link above and follow the tutorial. I’m gonna tell you what to do before you do it so listen up:
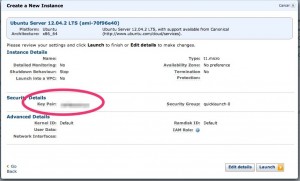
Your going to select an EBS volume (basically a pre installed linux distribution). Then you’re going to set up some security features that allow you to log into your EC2 server via SSH. To do this you will need a .pem key. These are private keys you can generate here: http://docs.aws.amazon.com/AWSEC2/latest/UserGuide/ec2-key-pairs.html#having-ec2-create-your-key-pair NOTE: you need to save this .pem file somewhere where you won’t forget it because you’re going to use it again, over and over. It’s attached to a security group. If you have the pem file and you associate the security group with your EC2 server, then you will be able to login with SSH, if not, then you will have to generate it all over again. Finally, you will set up some iptable rules that allow you to connect via SSH login to your server, as well as connect via HTTP.
After that, you will set up apache and php on your server. That’s fun, ok let’s go…
Step 1:
You need to login into your amazon dashboard: https://console.aws.amazon.com. Click the button at the top that says “launch”
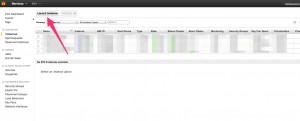 Step 2:
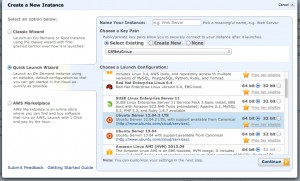
Follow the wizard instructions. In this case, I used the quick wizard since I already have my security groups set up. However, if you don’t have you security groups or don’t know what the hell I’m talking about follow this tutorial: http://docs.aws.amazon.com/AWSEC2/latest/UserGuide/ec2-key-pairs.html#having-ec2-create-your-key-pair
Set your security group, then use the quick wizard to set up your instance:
 And make sure the instance is associated with your security group:
Once you have it, click the launch button.
Step 3:
Now you need to get this sucker an IP address. Click on the elastic IP section of you dashboard and create a new static IP if you don’t already have one. If you do have one, make sure it’s freely available to associate with your instance.
Select your IP and click the “Associate” button to get the two paired up. If you don’t see your instance in the drop down options, wait until it has finished setting up.
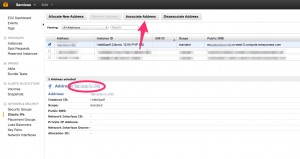 Now that you have an instance up and running with a static IP and a security group, you need to ssh in and get your server set up Fo’ Real.
Step 4:
To ssh in, you’re going to need a few things. First, you need to know where your .pem file is. It’s the file you generated and downloaded when you created your security group. If you’re not on a mac, follow this tutorial to connect: http://docs.aws.amazon.com/AWSEC2/latest/UserGuide/ec2-connect-to-instance-linux.html. In fact you should follow that tutorial instead of listening to my shit anyway…but here it goes.
Type this into your terminal:
ssh -i ~/.ssh/mySecurityGroup.pem ubuntu@000.000.000.000
You need to replace the “000” with your static IP address and replace the file path to point to your .pem file.
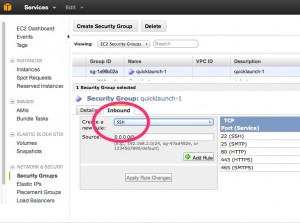
You should see yourself log into your server. If you get an access denied or it just hangs forever, make sure port 22 is open. You can do that here:
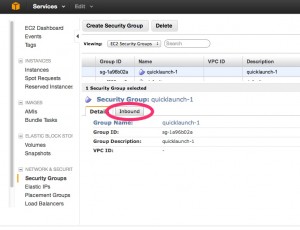 Just select port ssh from the drop down and hit the “Add Rule” if you don’t already see it on the right hand side of your console.
You’ll notice I opened ports 22, 25, 80, 443 and 465. You can go ahead and do the same if you want. These are common ports for http, https and smtp mail services.
Make sure to “Apply Rule Changes”.
Step 5:
Now that we’ve set up our server, opened the proper ports, associated the EC2 instance with a static IP address and SSHed in. We are ready to set up apache.
Since we’re on Ubuntu the setup if fairly straight forward.
SSH to your server:
ssh -i ~/.ssh/mySecurityGroup.pem ubuntu@000.000.000.000
Then make sure your have all your ports open:
iptables -I INPUT -p tcp --dport 80 -m state --state NEW,ESTABLISHED -j ACCEPT
iptables -I OUTPUT -p tcp --sport 80 -m state --state ESTABLISHED -j ACCEPT
iptables -I INPUT -p tcp --dport 443 -m state --state NEW,ESTABLISHED -j ACCEPT
iptables -I OUTPUT -p tcp --sport 443 -m state --state ESTABLISHED -j ACCEPT
Then make sure everything is up to date:
sudo apt-get update
Once that is finished we want to install apache2:
sudo apt-get install apache2
Once installed apache will try to run itself, we just need to restart the apache instance so we can test it:
sudo apache2ctl graceful
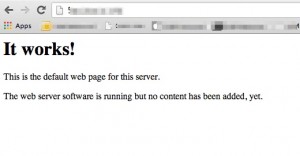
We should test this out in a browser. If you visit your static IP in the browser you should see something like this:
 Step 6:
Once we’ve got apache up and running it’s time to get PHP installed. Follow the same process by using apt-get to install:
sudo apt-get install php5
Now we want to install some common libraries for PHP like cURL etc.:
sudo apt-get install php5-mysql php5-dev curl libcurl3 libcurl3-dev php5-curl php5-gd php5-imagick php5-mcrypt php5-memcache php5-mhash php5-pspell php5-snmp php5-sqlite php5-xmlrpc php5-xsl
Now we are ready to restart apache:
sudo apache2ctl graceful
If all worked correctly, you should now have a working php installation. You can test it with:
php -v
The last thing you probably want to do is install some ftp or git software so you can acutally get your projects on the server. In this case I will install Git.
Step 7:
Install git on your server:
sudo apt-get install git
This will allow you to develop on a localhost environment and push to a remote repository, the through git hooks you can automatically keep your server’s version synced with the master branch and your project will be automagically updated.
NOTE:
Since Ubuntu is notorious for shipping with older version of PHP, there’s a great method for getting newer version in around 4 lines in your terminal:
sudo add-apt-repository ppa:ondrej/php5
sudo apt-get update
sudo apt-get install python-software-properties
sudo apt-get update
sudo apt-get install php5
php5 -v
You may also want to add your ubuntu user to the apache user group www-data:
sudo usermod -a -G www-data  ubuntu
groups ubuntu
You may also want to change the permissions of your root public folder. The folder that holds all my web content is located at /var/www. To make it writeable by my user and git, I changed the ownership to:
chown -R ubuntu:www-data /var/www
This allows me to write to the folder with git. I also made a symlink called “htdocs” by doing:
ln -s /var/www /user/ubuntu/htdocs
This put an htdocs folder in my user’s home directory. Now I’m set.
Google Cloud Compute Engine
In the next section we are going to talk about doing roughly the same thing on Google Cloud Compute Engine. They provide a similar service with the added benefit of Google’s infrastructure and speed.
