Getting started…
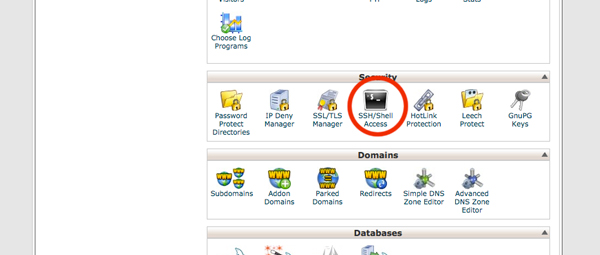
You must have shell access available on your server. If you don’t know, you can always check the administration panel of your hosting to find out. Many hosting providers use something called “cPanel” to manage their backends, they will often change styles but the icons will look the same. Look for something that looks like this:
If you have shell access enabled on your account you should be either able to view the access credentials by clicking on this icon, or set them up.
Things you should know…
Having shell access available is sometimes dangerous, especially if your don’t use authentication keys. I have set up ssh keys on my server and only allow ssh keyed connections, this way you can’t just try to guess a password…you must have a keyed pair in order to make a connection. However, for the scope of this tutorial, I’ll simply explain how SSH to your server using the password credentials you set up in the last section.
Connecting…
Now that you have shell access set up, it’s time to connect. If you don’t know your server’s IP address you can look up your domain at: http://www.intodns.com/ which will provide information about your hosting provider and should present your server’s IP address if it’s available. If it’s not listed here, you must log into your hosting account and find it there.
If your on a mac the ssh connection command looks like this:
ssh username@111.222.333.444 -p1234
Just replace the username with your ssh login credential, the IP address numbers with your server’s IP and “-p1234” with the port number your ssh access is allowed on (usually this is run out of port 22, you should change this if you can as everyone knows that’s the standard port for ssh access).
If your on a windows machine, the process is a little harder. First you need to download an ssh client like PuTTY.
I’ve found in the long run, using PuTTY on Windows is actually faster and more convenient than using a mac to connect via SSH.
