Adobe Edge Animate Events

A couple essential events for telling when your composition has loaded and when it has finished playing the timeline.

Loaded Event

[pastacode lang=”javascript” message=”” highlight=”” provider=”manual”]

AdobeEdge.bootstrapCallback(function (compId) {
    console.log('composition loaded: ' + compId);    
});

[/pastacode]

According to the documentation, this callback function will tell you when a composition has loaded and is ready to play. The event fires just before the timeline starts playing.

Timeline complete

If you want to know when the timeline is complete and all animations are finished you can bind a timeline action to the composition. You just need to know which composition ID to bind to. So something like this ought to work:

[pastacode lang=”javascript” message=”” highlight=”” provider=”manual”]

AdobeEdge.Symbol.bindTimelineAction(compId, "stage", "Default Timeline", "complete", function(sym, e) {
    console.log('timeline complete');
});

[/pastacode]

You put them together like this:

[pastacode lang=”javascript” message=”” highlight=”” provider=”manual”]

AdobeEdge.bootstrapCallback(function (compId) {
    console.log('composition loaded: ' + compId);    
    AdobeEdge.Symbol.bindTimelineAction(compId, "stage", "Default Timeline", "complete", function(sym, e) {
        console.log('timeline complete');
    });
});

[/pastacode]

And here’s the embedded adobe code on a page:

[pastacode lang=”markup” message=”” highlight=”” provider=”manual”]

<!--Adobe Edge Runtime-->
<meta http-equiv="X-UA-Compatible" content="IE=Edge">
<script type="text/javascript" charset="utf-8" src="edge/specialized/edge_includes/edge.5.0.1.min.js"></script>
<style>
    .edgeLoad-EDGE-150750921 { visibility:hidden; }
</style>
<script>
   AdobeEdge.loadComposition('edge/specialized/specialized', 'EDGE-150750921', {
        scaleToFit: "none",
        centerStage: "horizontal",
        minW: "0",
        maxW: "undefined",
        width: "550px",
        height: "309px"
    }, {dom: [ ]}, {dom: [ ]});

    AdobeEdge.bootstrapCallback(function (compId) {
        console.log('composition loaded: ' + compId);    
        AdobeEdge.Symbol.bindTimelineAction(compId, "stage", "Default Timeline", "complete", function(sym, e) {
            console.log('timeline complete');
        });
    });


</script>
<!--Adobe Edge Runtime End-->

[/pastacode]

Easy.

Easily Index the Australian Cancer Research User Submissions

Don’t know what you could do with this, but it seems the australian cancer research foundation launched a site where user can submit their photos and be a part of an interactive video experience. Check it out here: https://theone.cancerresearch/.

I noticed after I had submitted that I was taken to a url: https://theone.cancerresearch/i-am-103 – the key here to notice is that this url looks like an id in disguise…

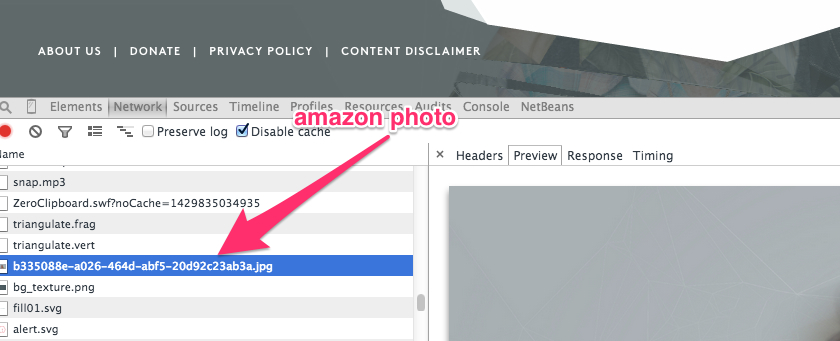
The “103” at the end gives it away, it’s an auto incrementing system, if you submit another webcam photo, you’ll get 104. So you can guess that these posts are being submitted automatically. So I dug into the page. You can see straight away that there is an image linked in Amazon S3 where my webcam photo was stored:

screen

My first thought is that you can just simply visit the url for all the photos: https://theone.s3.amazonaws.com/faces, but this was of course protected since it’s amazon.

Since these photos are being added automatically, we can assume there is no moderation. I would venture there are some dick pics on the site. I’m half in the mood to write a script tonight that will index all of the images, and give me a quick gallery of everyone’s user submitted photos, not sure what I’d find…


Blender Not Exporting Textures for THREE.js

So you’ve created a model in THREE.js and it’s not exporting your textures or your models are showing up blank when you import them with collada loader.

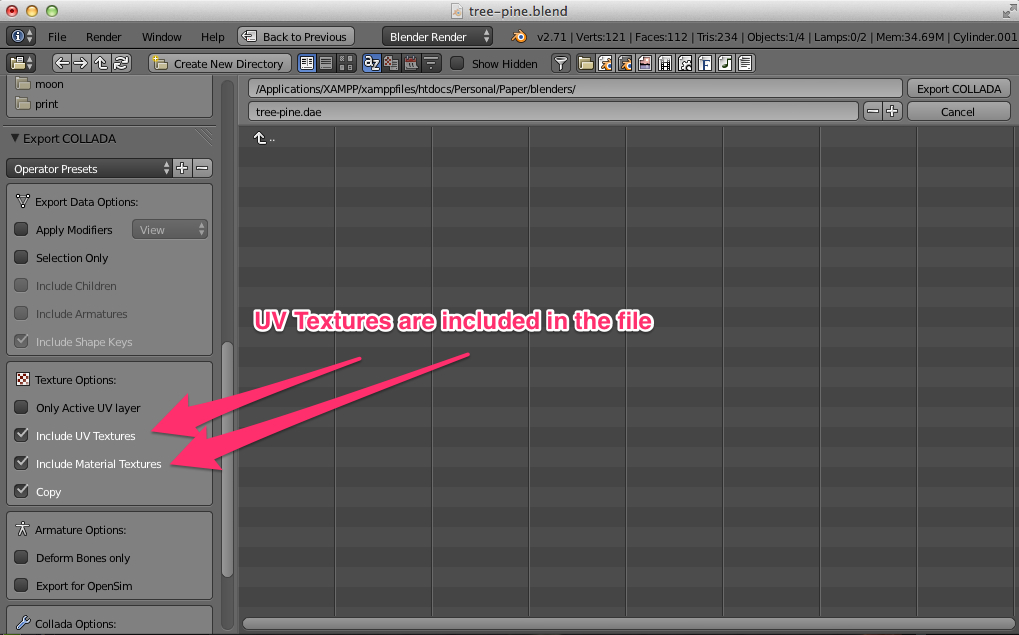
This one’s nice and easy. Just make sure you are checking the boxes to include UV textures:

uvtextures

Then make sure your file paths are right. The collada file is just XML so you should be able to open the file with your favorite text editor. Make sure the URLS that point to the texture files are correct and that your textures are copied into the directory with your collada file.

That’s it!

HTML5 Geolocation

Let’s get your geolocation, super easy:

[pastacode lang=”javascript” message=”” highlight=”” provider=”manual”]

function getLocation(callback) {
    if (navigator.geolocation) {
        navigator.geolocation.getCurrentPosition(function(pos) {
            var loc = {
                lat: pos.coords.latitude,
                long: pos.coords.longitude,
                heading: pos.coords.heading
            };
            callback(loc);
        });
    }
} 

[/pastacode]

You could use it like this:

[pastacode lang=”javascript” message=”” highlight=”” provider=”manual”]

getLocation(function(loc) {
    console.log(loc)
});

[/pastacode]


HTML5 Compass

I’m starting to use this site again!

let’s start off with a simple one: HTML5 Compass.

Just an FYI its mostly only partially supported (http://caniuse.com/#search=deviceorientation).

Super simps, just include the script below: and you should be up and running with the compass. NOTE: just remove the jquery closure if you arent using it.

[pastacode lang=”javascript” message=”” highlight=”” provider=”manual”]

(function($) {
    $(window).load(function() {
        if(window.DeviceOrientationEvent) {
            $(window).on('deviceorientation', function(evt) {
                console.log(evt.originalEvent.alpha)
            });
        } else {
            console.log('no compass');
        }
    });
})(jQuery);

[/pastacode]

You might want to think about using something like modernizr to check as well. Also, you might want to think about wrapping it in a closure so you fire this after the window loads.

CSS Boxes

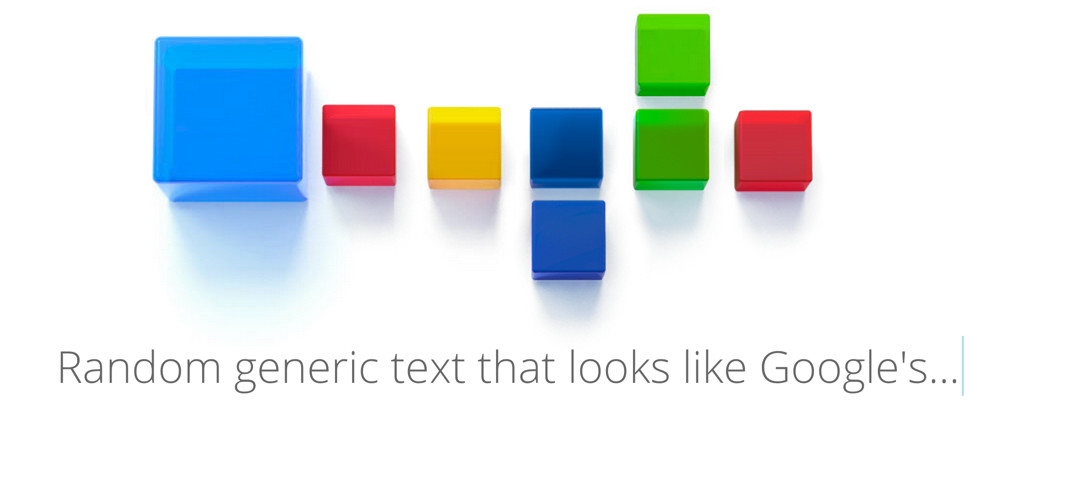
I have no idea. It was inspired by something I saw on a google site, so I stole the images and re-wrote the animation sequence.

DEMO

BoilerGL

A simple boiler plate for those of us new to webgl.

Just grab a copy here: https://github.com/GSPBetaGroup/BoilerGL and get started by removing the default geometries.

You have two functions at the top of the script. One to “init” the experience:

[pastacode lang=”javascript” message=”” highlight=”” provider=”manual”]

/**
             * Init the page with defaults. Add your objects to the scene here. All the initialization is take care of.
             * 
             * By default, the scene initializes with mouse movement & click events. The scene animates with a fly in
             * and has user controls centered around (0,0,0).
             * 
             * @returns {undefined}
             */
            function init() {
                
                // ADD YOUR THINGS HERE
                
                // box
                var geometry = new THREE.BoxGeometry( 300, 300, 300 );
                var material = new THREE.MeshLambertMaterial( { color: 0x00FF00 } );
                var mesh = new THREE.Mesh( geometry, material );
                scene.add( mesh );
                interactiveObjects.push(mesh);
                objects.push(mesh);
                
                // sphere
                var geometry = new THREE.SphereGeometry( 50, 32, 32 );
                var material = new THREE.MeshBasicMaterial( {color: 0xffff00} );
                var sphere = new THREE.Mesh( geometry, material );
                sphere.position.x = 500;
                sphere.position.y = 500;
                scene.add( sphere );
                interactiveObjects.push(sphere);
                objects.push(sphere);
                
            }

[/pastacode]

You can see I’ve added a box and a sphere here, by default. Feel free to remove these. Then, a second function called “loop” where you can control the animations of the items:

[pastacode lang=”javascript” message=”” highlight=”” provider=”manual”]

/**
             * Tween is where you define your behavior. By default the scene automatically calls this function
             * every animation frame.
             * 
             * @returns {undefined}
             */
            function loop() {
                count += .001;
                for (var i = 0; i < objects.length; i++) {
                    var o = objects[i]
                    if (i % 3 == 0)
                        o.position.x += Math.sin(i + count) / 2
                    if (i % 3 == 1)
                        o.position.y += Math.cos(i + count) / 2
                    if (i % 3 == 2)
                        o.position.z += Math.cos(3 * i + count) / 2
                };
                
            }

[/pastacode]

You can see here, I’m the objects above are gently floating, but you can remove this as well!

That’s it. Two functions, should be fairly easy to get started now.

Thanks to Marpi for contributing the initial code to get this started. I simply re-worked his code to make it easier to use.